Four Methods of Hardwood Flooring Installation Along With General Tips
Hardwood floors are one of the most preferred options for flooring. The flooring looks elegant and is durable and strong. However, hardwood flooring installation can be a little expensive unless you decide to do it by yourself.
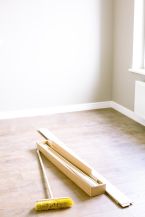
Installing a hardwood floor can be done in several ways, and understanding them will help you in the installation process.
If you have chosen the DIY route, be prepared to invest some time in the research and execution of the installation. However, if the work seems tedious or confusing at any stage, feel free to contact hardwood flooring installation in Phoenix who can help you in transforming your house.
Let us discuss the four installation methods for hardwood floors.
1. Nailing the planks to a subfloor
This traditional method of nailing hardwood planks to the subfloor is preferred mainly due to its permanence. However, this method is suitable only if you have a wooden subfloor. Ideally, plywood or oriented strand wood subfloor with 0.75-inch thickness works for this flooring method.
If you do not have a wooden subfloor, you can install the subfloor and then nail the planks on it. However, this can add significantly to your cost.
If you have no prior experience in installing a hardwood floor, you may find this method extremely difficult, and professional help is a better option.
The method requires special equipment called a nail gun, and the nails go into the tongue of the plank. After the installation, the nails are hardly visible.
The planks expand and contact post-installation. Hence, it is advisable to leave a gap of 0.25-0.35 inches from the wall.
2. Stapling the planks to the subfloor
The second method of hardwood flooring installation is similar to the nailing method, except that you use staples in place of nails. This method requires a wooden subfloor too.
Staples attach the planks to the subfloor more firmly than nails and provide secure and sturdy flooring. However, their grip does not allow much room for movement and can be an issue when the planks expand and contract.
3. Gluing the hardwood floor
The third method is gluing the hardwood floor to the subfloors. Many different types of floors can be installed with this method.
The adhesive is simply applied on the subfloor in small sections, and the planks are laid over it. Straps are used to avoid gaps between planks.
Once the adhesive dries, the floor is flexible to accommodate changes in temperature and humidity.
4. Floating floors
In this method, the planks are not attached to the subfloors at all. It rather floats on top of the subfloor. Only engineered wooden planks can be installed by this method and not solid hardwood.
The grooves in each plank are clicked together to join them. The floor stays in place due to the pressure of the planks and surrounding walls.
If you are new to the installation process, this is the easiest method for hardwood floors, and you must give it a try. Make sure to leave a gap of approximately 0.45 inches to allow for expansion and contraction.
Some of the general tips that can help you in the installation of hardwood floors are as follows.
1. Take measurements of the flooring space and assess the total area to be covered in square feet. Add an extra ten percent to the total requirement of hardwood to allow for any mistakes in cutting and installation.
2. Prepare the subfloor for installation by removing carpets and pads. Ensure the subfloor is even and clean.
3. Perform a moisture test if you have a concrete subfloor.
4. Gather the required equipment based on the installation method like nail guns, staple guns, adhesive, etc.
5. Wooden floors are porous, and hence before you use them in the installation, they should be acclimated. Keep the planks outside the box for 5-7 days, depending on the type of wood you are using.